
You love strawberry treats, but your cookies look a little homemade. You want clear, repeatable steps so your cookies look like they came from a bakery. This guide shows you how to decorate strawberry cookies like a professional baker, with simple tools, color tricks, and piping techniques you can do today.
You’ll learn how to prepare the cookie base, make quick strawberry glaze and buttercream, pipe realistic seeds and leaves, and finish for a polished, pin-worthy result. Follow the steps and your next batch will be irresistible on-camera and at the table.
What You'll Need to Decorate Strawberry Cookies
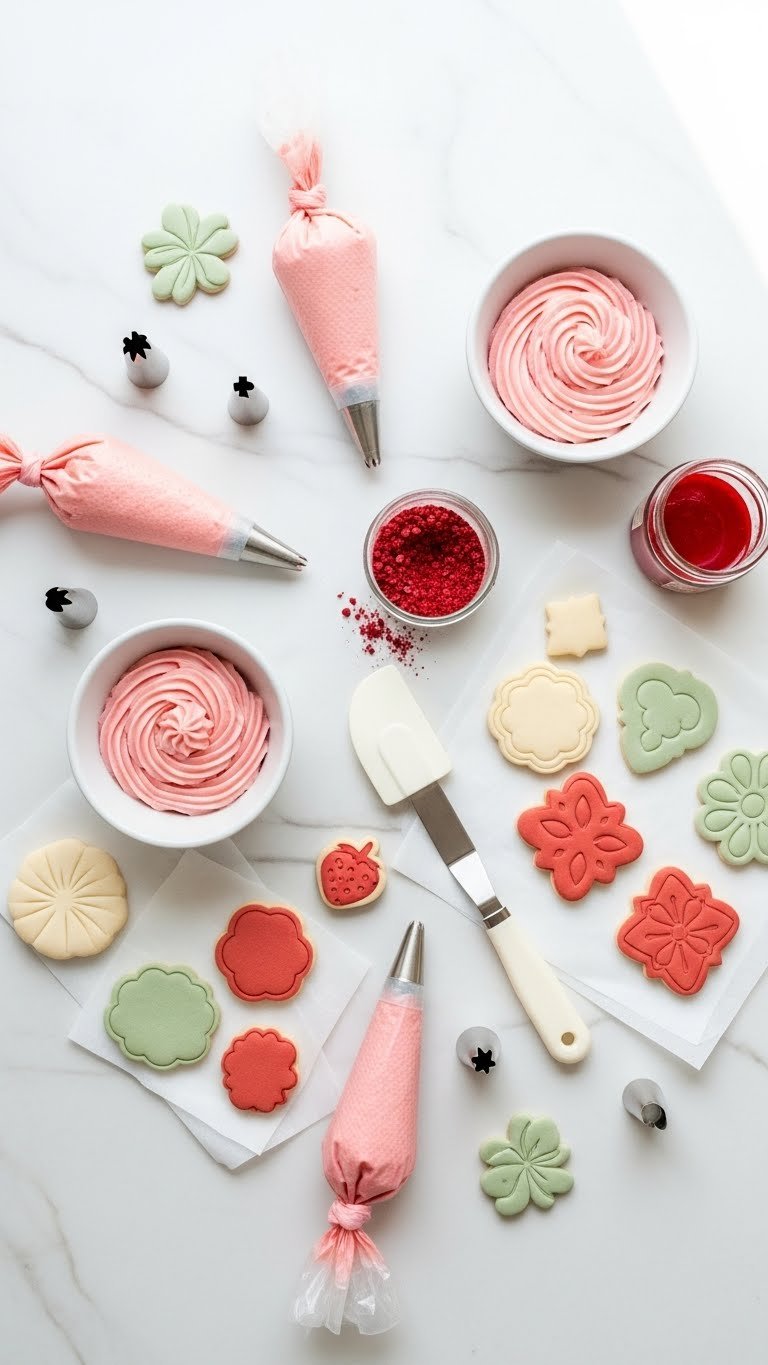
Gathering everything first saves time and keeps your workspace tidy. Here’s a concise list you can check off.
- Tools: Piping bags, #2 and #352 piping tips, small offset spatula, disposable gloves, toothpicks.
- Ingredients: pre-baked sugar or shortbread cookies (strawberry-shaped or round), 1 cup powdered sugar + 1–2 tbsp milk for glaze, 2 cups buttercream colored pale pink.
- Extras: freeze-dried strawberry powder (1–2 tbsp), red gel food color, green gel for leaves, clear piping gel for shine.
Tip: Use slightly thicker glaze for a smooth finish. If you’re short on time, buy plain iced cookies and skip straight to decorating.
Prepare Your Cookie Base
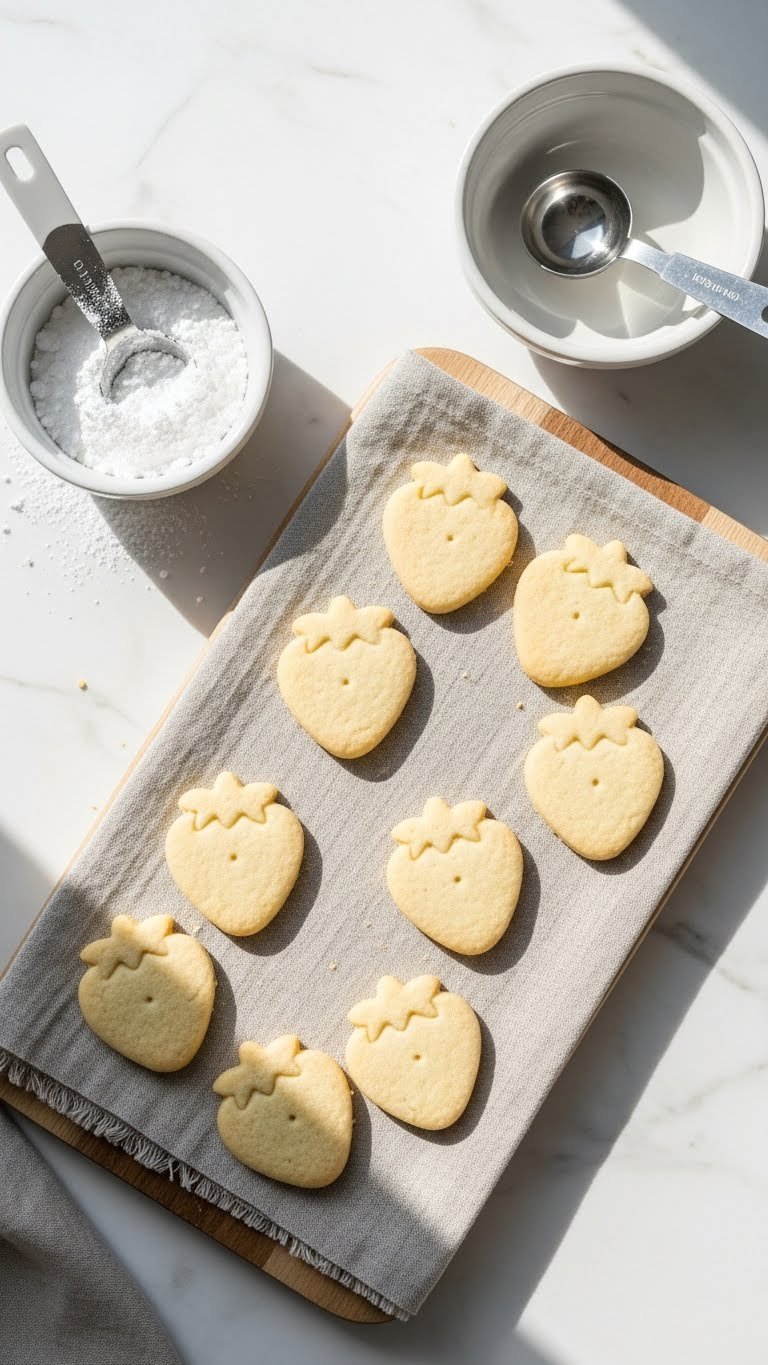
A smooth base makes decorating easy and professional-looking. If you’re baking:
- Bake cookies thin so they dry well—350°F for 8–10 minutes depending on size.
- Cool completely on a wire rack, 30–40 minutes.
For a glazed base:
- Mix 1 cup powdered sugar with 1–2 tablespoons milk and 1 tsp freeze-dried powder.
- Tint to a soft strawberry pink with red gel—use a toothpick at a time.
Spread glaze with an offset spatula, then let set for 20–30 minutes before piping. If you prefer a matte look, use a light buttercream crumb coat then chill 10 minutes.
Step-by-Step Decorating Instructions (Piping Seeds & Leaves)
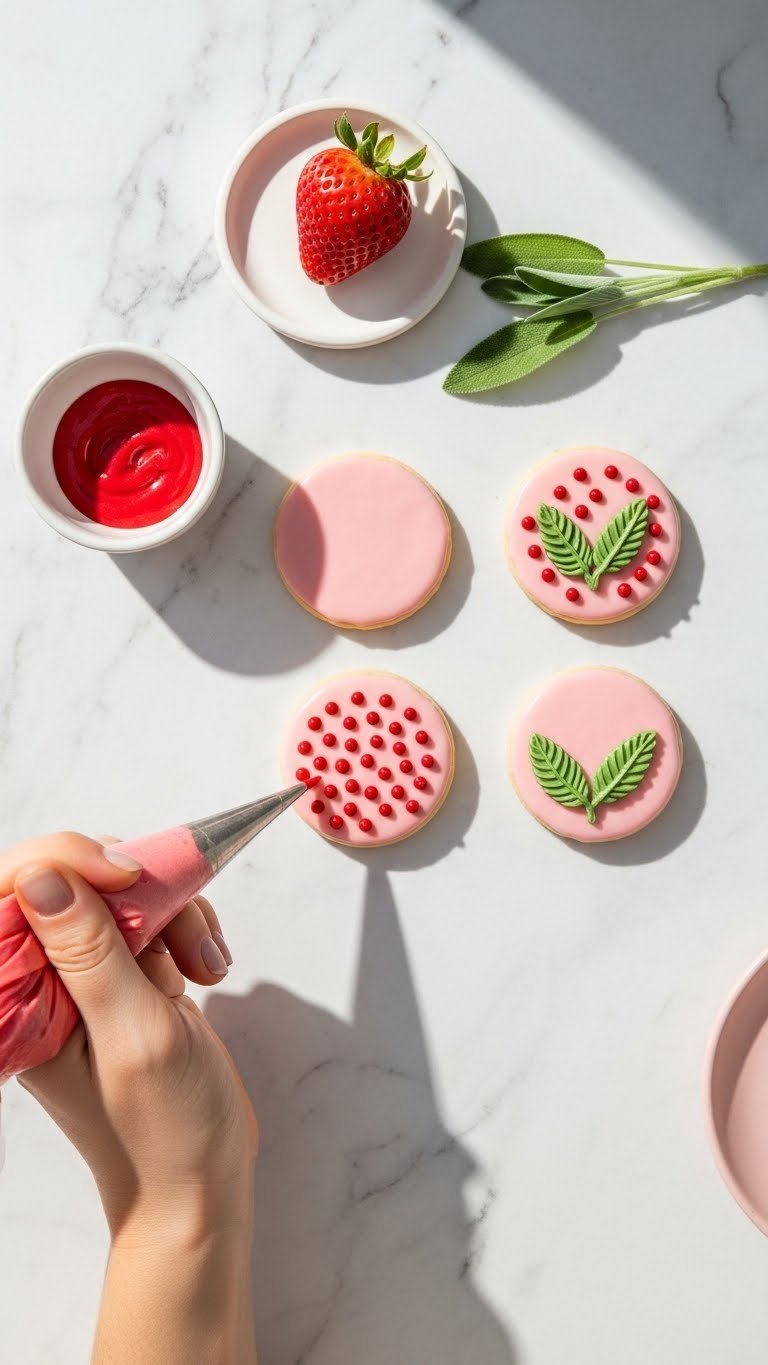
Follow these sequential steps to decorate strawberry cookies like a professional baker.
- Outline and flood (if using royal icing): Pipe the edge with slightly thicker pink icing, then flood with thinner icing. Let dry 30–60 minutes.
- Add seeds: Use red royal icing in a #2 round tip. Pipe small teardrop dots spaced evenly across the cookie. Work in rows for consistency.
- Pipe leaves: Switch to green buttercream with a leaf tip #352. Hold the bag at a 45-degree angle. Squeeze, pull, and release to make 1–2 leaves at the top.
- Add texture: Dust a tiny pinch (about 1/8 tsp) of freeze-dried strawberry powder over the cookie for depth.
Pro tips:
- Practice seed spacing on parchment first.
- Use a toothpick to nudge a stray dot into place before icing sets.
- Chill cookies for 5 minutes between layers to speed drying.
Finishing Touches and Serving/Storage Tips
Finish like a pro with these quick touches.
- Shine: Brush a tiny amount of clear piping gel for a glossy highlight.
- Packaging: Place parchment between layers in an airtight tin.
- Storage: Store at room temperature up to 3 days, or refrigerate up to 1 week. Bring to room temperature before serving.
Common mistakes to avoid:
- Using runny glaze—cookies will lose shape.
- Overcrowding when drying—allow space for airflow.
- Skipping a practice run for new piping tips.
Try a quick variation: swap pink for pale peach and add tiny white speckles with a flicked brush for a vintage look.
You now have a clear plan to make cookies that look bakery-made. Pin this guide for your next party and save the image for styling ideas. Which piping trick will you try first? Ready to make this happen? Let's do it!
Recent Posts
14 Light Spring Strawberry Dessert Recipes That Feel Seasonal
Spring mornings beg for bright, light desserts that match the season. You want strawberry sweets that feel fresh, not heavy, and that celebrate the fruit's short, sweet moment. These 14 Light...
12 Simple Easy Spring Strawberry Recipes That Anyone Can Make
Spring is the season when strawberries smell like sunshine, and your kitchen wants to celebrate. If you’ve got a basket of fresh berries and a craving for simple, fresh flavors, these 12 simple...