
You want chocolate covered strawberries that look professional, but you don’t have a pastry chef’s kitchen. You’re in the right place. This guide shows you how to make chocolate covered strawberries that look professional using simple tools, clear timings, and tiny tricks that make a big visual impact.
You’ll learn which chocolate to use, how to dip without streaks or blooms, and how to add elegant finishes that photograph beautifully for Pinterest or a special gift.
What You'll Need (Ingredients + Tools)
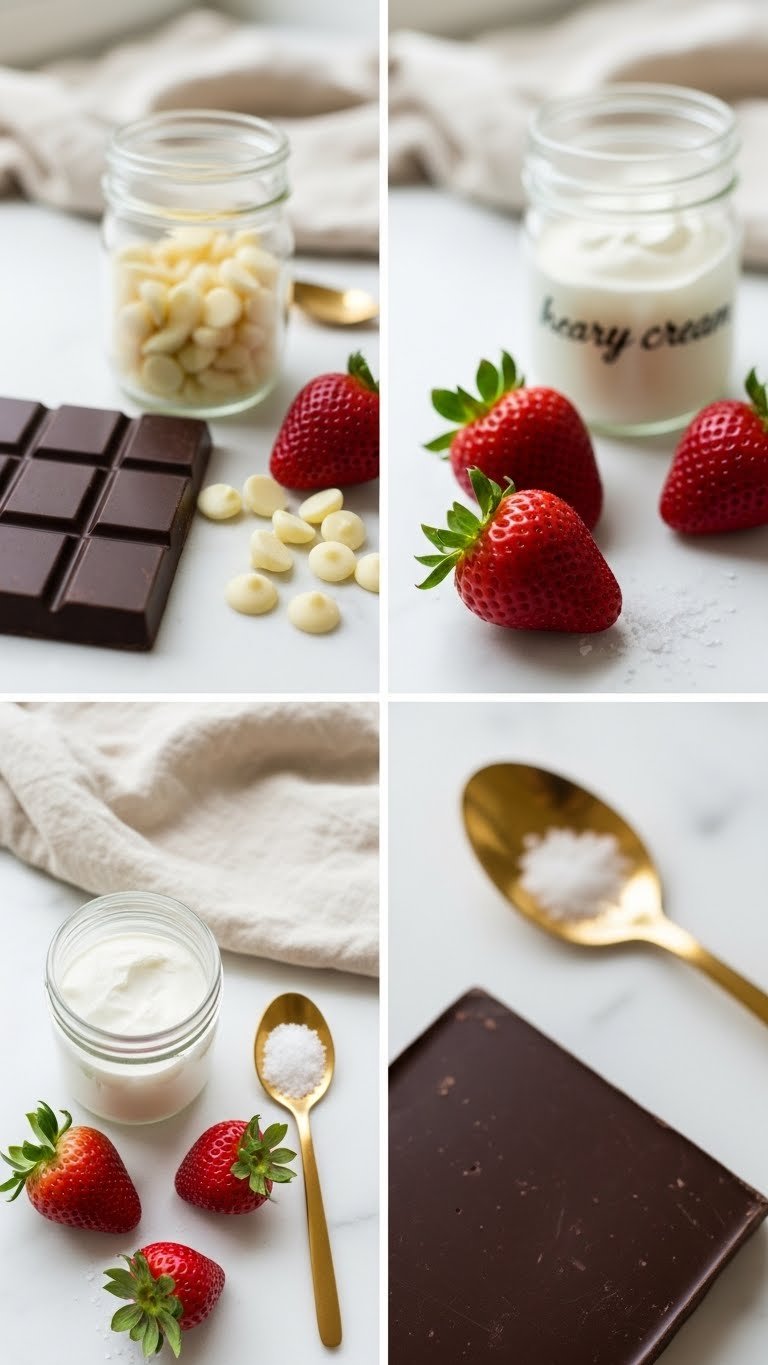
- Ingredients
- 12–16 large strawberries, ripe but firm
- 8 oz (225 g) dark chocolate (62–70% cocoa)
- 4 oz (115 g) white chocolate for accents
- 1 tsp neutral oil (optional, makes chocolate shinier)
- Tools
- Small saucepan and heatproof bowl (for double boiler)
- Baking sheet lined with parchment
- Fork or dipping tool, teaspoon for drizzling
- Toothpicks or skewers for detail work
- Instant-read thermometer (helpful for tempering)
Tip: Choose strawberries with bright green tops and similar sizes for a uniform look.
Preparing Your Ingredients
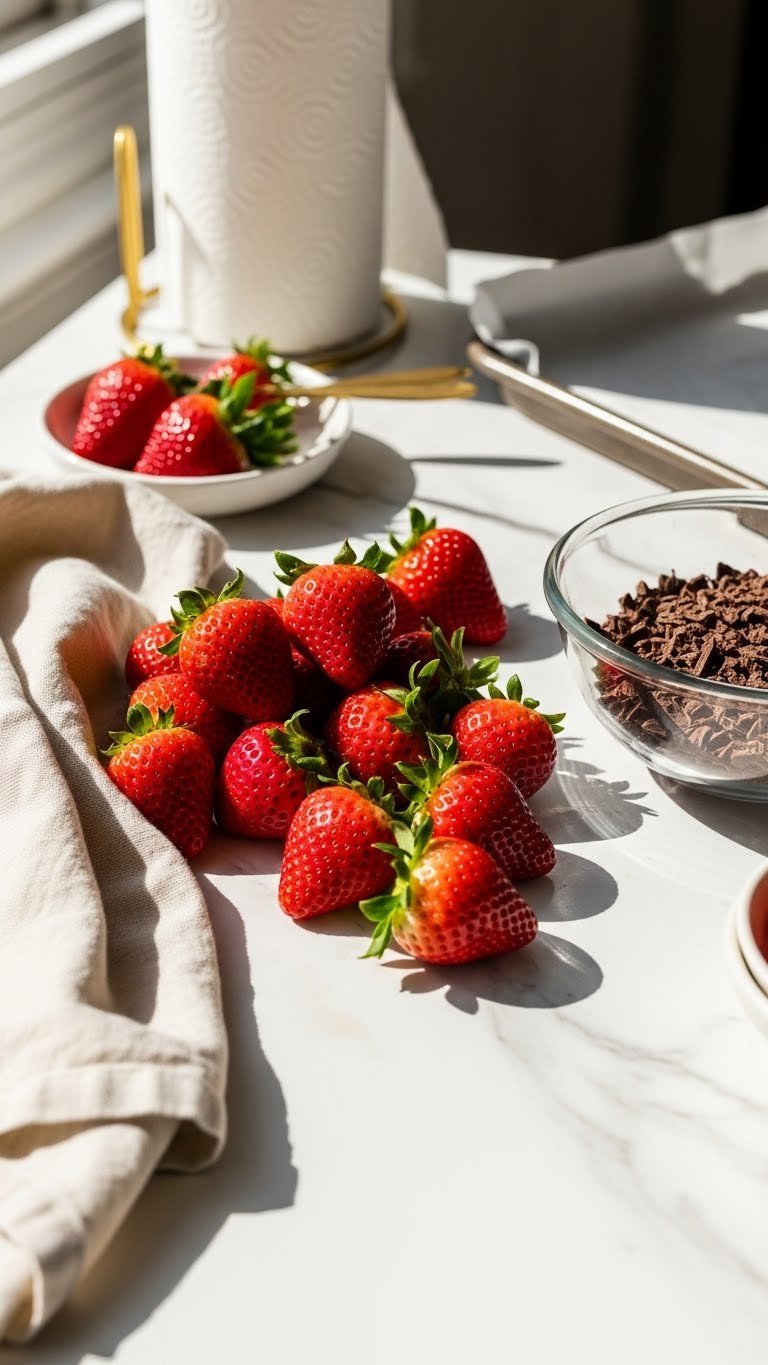
Start with perfectly dry fruit — any water causes the chocolate to seize or not stick. Pat strawberries dry and let them sit at room temperature for 30 minutes before dipping.
Chop chocolate into even pieces for smooth melting. If you’re short on time, microwave in 20-second bursts, stirring between bursts, until smooth. Add ½ tsp oil if the chocolate looks grainy, but avoid excess oil — it affects the finish.
If you want glossy, snap-free chocolate, temper it:
- Heat dark chocolate to 115°F (46°C), cool to 82°F (28°C), then warm slightly to 88–90°F (31–32°C) for dipping.
Step-by-Step Instructions for a Professional Finish
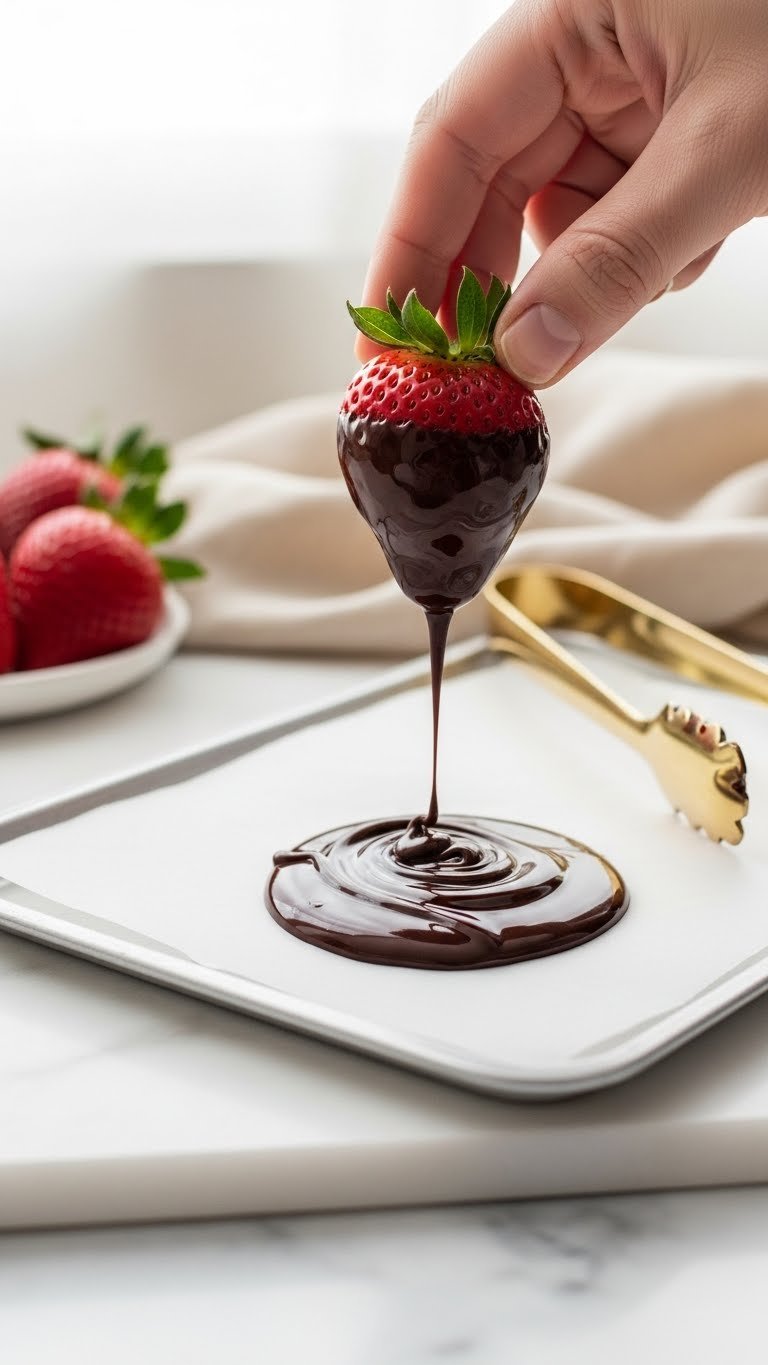
- Hold the strawberry by the stem and dip at a 45-degree angle, rotating to coat two-thirds or fully, depending on your style.
- Lift and let excess chocolate drip back into the bowl; tap the fork gently on the bowl rim to remove drips.
- Place dipped berries on parchment with the stem angled slightly upward so chocolate runs neat and sets clean.
- If adding a second color, wait 2–3 minutes until the first coat sets slightly, then drizzle or dip.
Quick tips:
- Work in small batches so chocolate stays at the right temperature.
- If chocolate thickens, warm for 5–10 seconds in the microwave and stir.
Decorating, Drizzling & Finishing Touches
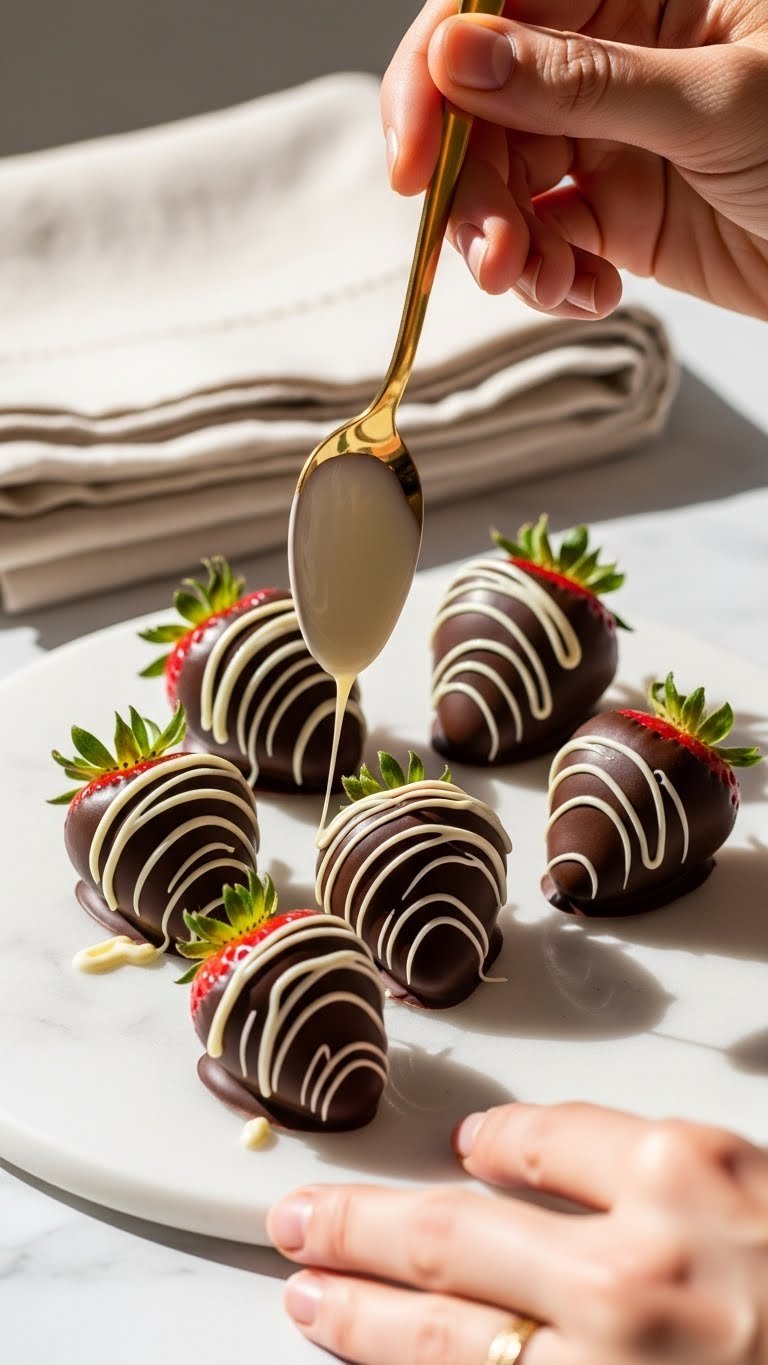
Make them look professional with simple finishes:
- White chocolate drizzle: melt white chocolate, use a spoon or small piping bag for controlled lines.
- Sprinkles or crushed nuts: sprinkle immediately after dipping while chocolate is wet.
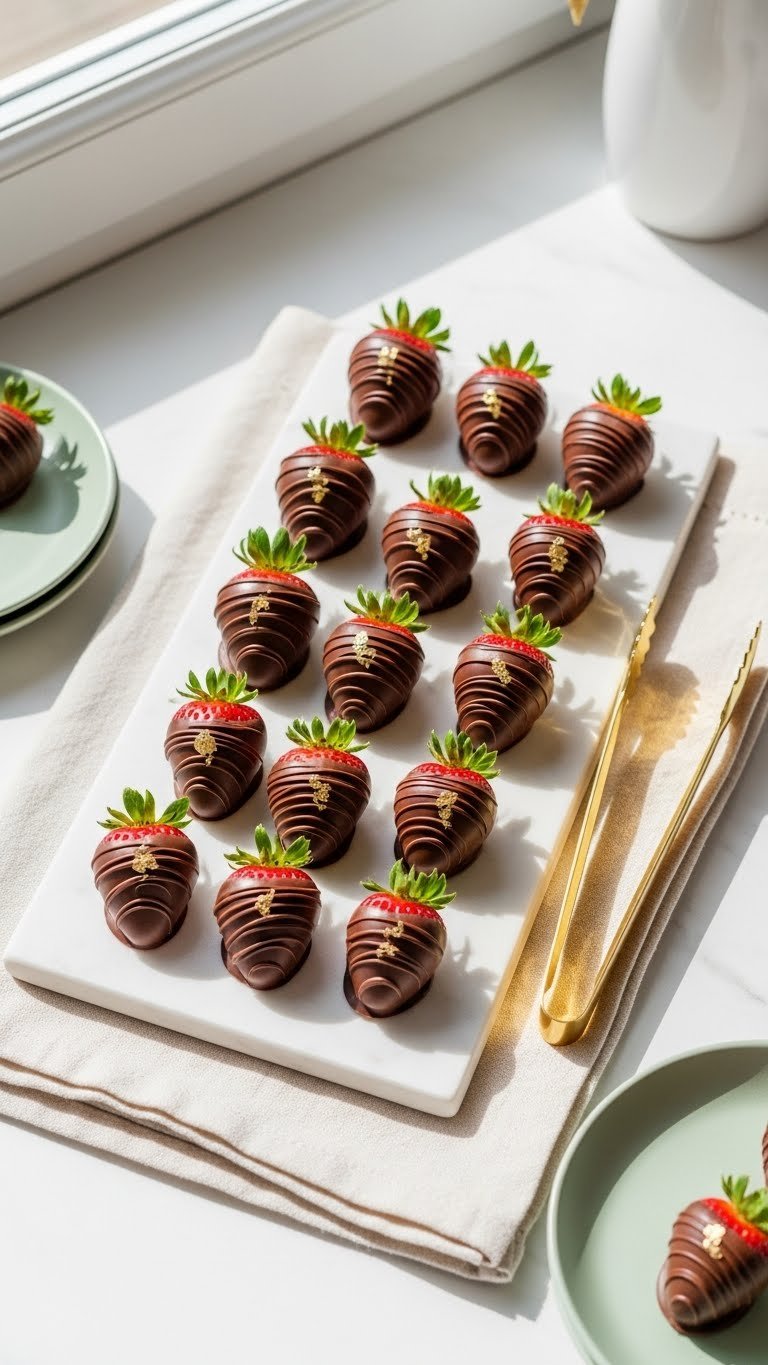
- Gold leaf or edible gold dust: apply with a tiny brush for a luxe touch.
- Sea salt: a light pinch on dark chocolate enhances flavor and looks sophisticated.
Pro trick: For clean two-tone berries, dip in dark chocolate, let set, then hold by the stem and dip the tip into white chocolate for a neat contrast.
Serving, Storage & Troubleshooting
- Serve within 4 hours for best texture and shine at room temperature.
- Store in a single layer in the fridge for up to 48 hours, but expect some condensation. Bring to room temperature 15–20 minutes before serving.
- Troubleshooting:
- If chocolate blooms (white streaks), it’s temperature-related; reheat gently and re-temper.
- If chocolate is grainy, it may have come into contact with water — start fresh chocolate.
Which variation will you try? Dark chocolate with sea salt, white-chocolate-draped berries, or a mixed platter with nuts and gold leaf?
You’ve got all the steps to make chocolate covered strawberries that look professional, and they’ll photograph beautifully for Pinterest or impress at your next gathering. Pin this guide for your next gift or party, save it for later, and share with friends who love elegant, simple desserts. Which tip will you try first? Ready to make this happen? Let's do it!
Recent Posts
14 Light Spring Strawberry Dessert Recipes That Feel Seasonal
Spring mornings beg for bright, light desserts that match the season. You want strawberry sweets that feel fresh, not heavy, and that celebrate the fruit's short, sweet moment. These 14 Light...
12 Simple Easy Spring Strawberry Recipes That Anyone Can Make
Spring is the season when strawberries smell like sunshine, and your kitchen wants to celebrate. If you’ve got a basket of fresh berries and a craving for simple, fresh flavors, these 12 simple...