
You want a breakfast that looks as good as it tastes and photographs well for Pinterest. This guide shows you how to make a strawberry yogurt bowl that's Instagram-ready in minutes. You'll learn simple assembly steps, exact measurements, and styling tips so your strawberry yogurt bowl pops in photos and on your feed.
Follow these short steps and you'll have a creamy, colorful bowl that tastes fresh, shoots beautifully, and is easy to recreate.
What You'll Need (ingredients + tools)
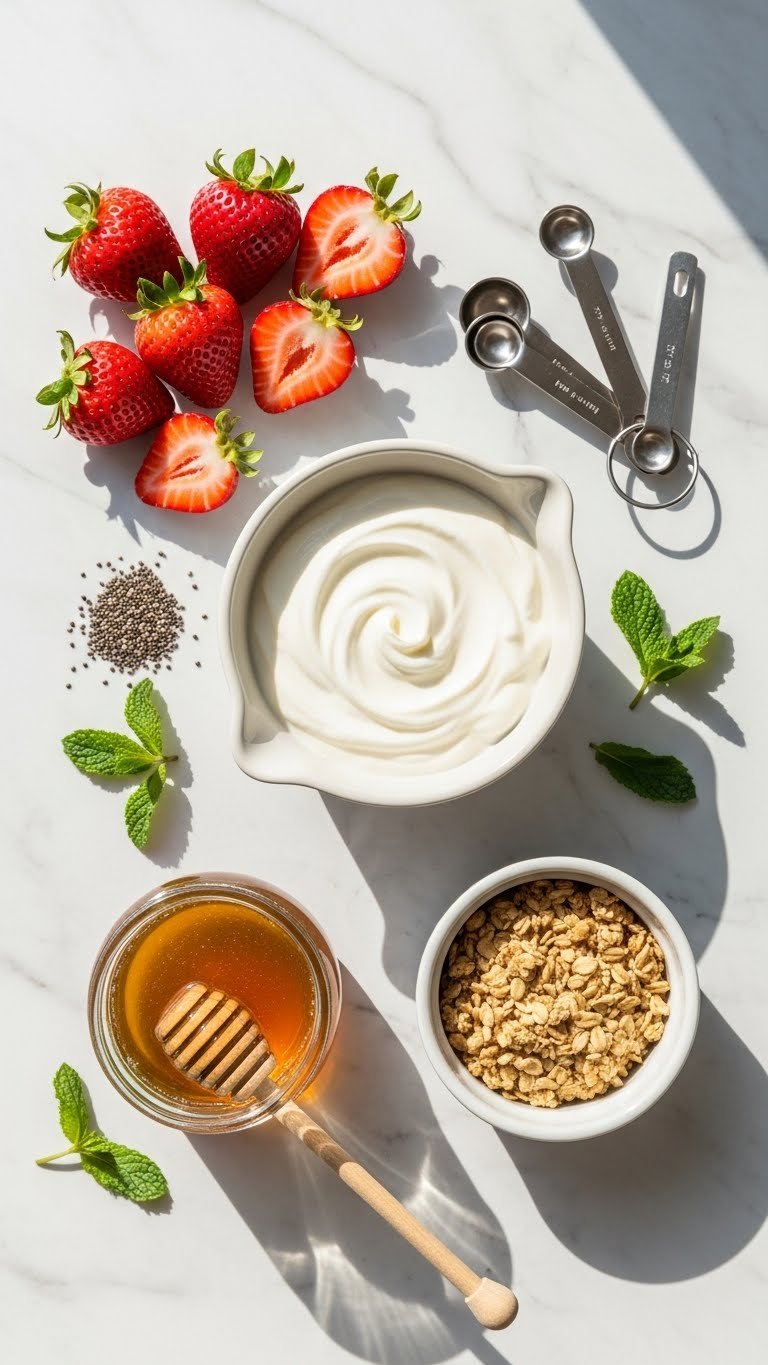
- Ingredients:
- 1 cup plain Greek yogurt
- 1/2 cup sliced fresh strawberries (+ extra for garnish)
- 1–2 tsp honey or maple syrup
- 3 tbsp granola
- 1 tsp chia seeds (optional)
- Fresh mint or basil leaves for color
- Tools:
- Bowl, small spoon, measuring spoons, sharp knife
- Prep time: 5–7 minutes
- Serves: 1 (double as needed)
Quick tip: Use full-fat Greek yogurt for creamier texture and better photo sheen.
Preparing Your Ingredients
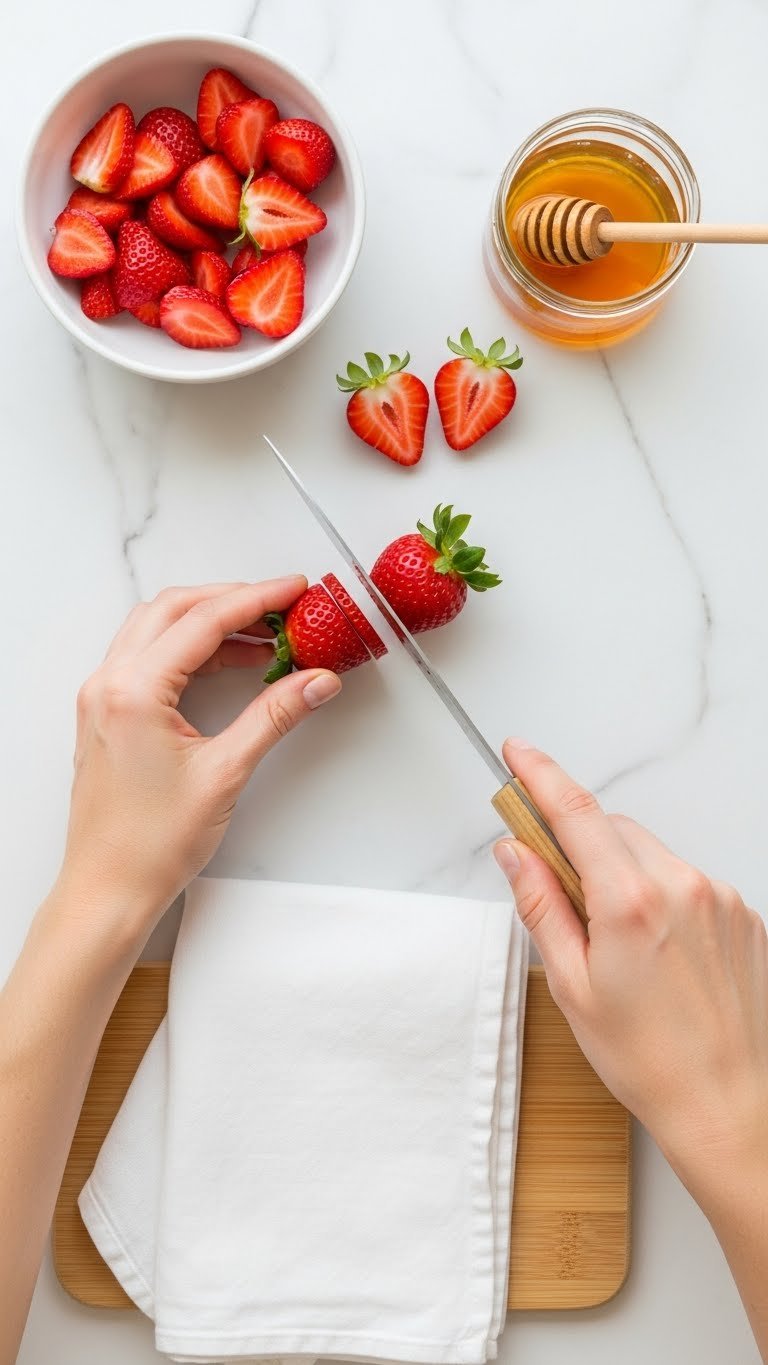
- Wash and dry berries thoroughly to avoid water droplets in photos.
- Slice strawberries thinly for layering; reserve a few halved berries for garnish.
- Mix 1 cup Greek yogurt with 1–2 tsp honey in a small bowl. Stir until smooth.
- If you want a softer color, mash a tablespoon of strawberries into the yogurt for a pale pink swirl.
Pro tip: Pat berries dry with a paper towel. Wet fruit reflects light oddly and blurs detail in close-up shots.
Step-by-Step Instructions (assembly & photography tips)
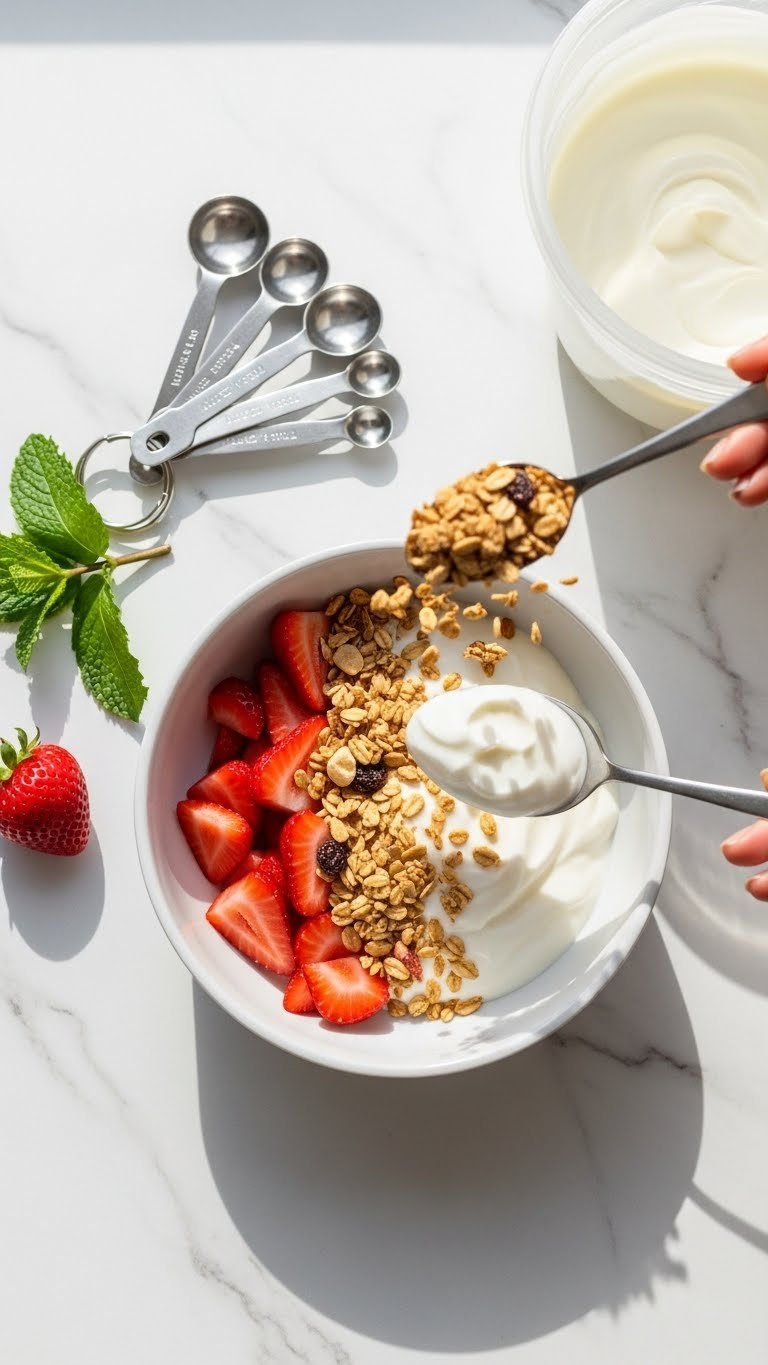
- Spoon 1 cup Greek yogurt into a shallow white bowl. Smooth the surface lightly.
- Arrange 1/2 cup sliced strawberries in a fan or concentric rings across one side.
- Sprinkle 3 tbsp granola across the opposite side for contrast.
- Add 1 tsp chia seeds and a drizzle of 1 tsp honey over the top.
- Finish with 3 halved strawberries and a small mint sprig at 45 degrees for depth.
Photography tips:
- Use an overhead flat lay to keep composition simple.
- Leave negative space on one side for a Pinterest-friendly crop.
- Shoot near a window with bright natural light and use a white reflector or napkin to soften shadows.
Common mistake: Overcrowding the bowl. Keep toppings deliberate so each element reads on camera.
Decorating/Finishing Touches
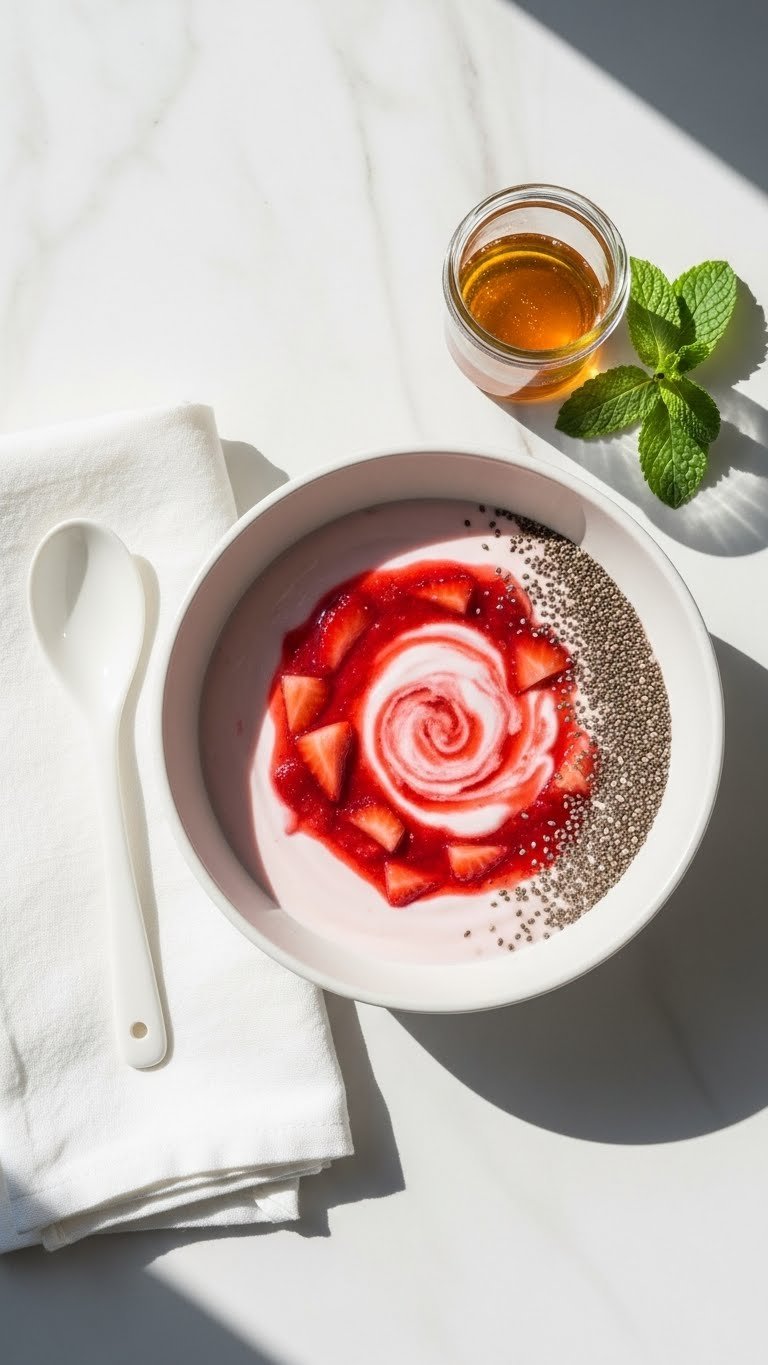
- Add texture: a sprinkle of toasted coconut or chopped almonds works well.
- For glossy fruit, brush a light swipe of honey on halved strawberries.
- Keep color contrast: a few tiny mint leaves or microgreens brighten the pink-white palette.
- Avoid over-saucing. A thin honey drizzle captures light and keeps the shot clean.
Pro trick: Use a toothpick to position tiny mint leaves without finger prints on fruit.
Serving and Storage Tips
- Serve immediately for best texture and photo-ready appearance.
- Make-ahead: keep yogurt and toppings separate in airtight containers for up to 24 hours.
- Leftovers: assembled bowls soften after a few hours; store components separately and assemble before serving.
- Variations:
- Swap honey for maple syrup to suit vegan diets.
- Use vanilla Greek yogurt for extra flavor.
- Add a spoonful of fruit compote for stronger color and shine.
Warning: Granola gets soggy if left too long. Pack it separately when prepping ahead.
You just learned how to make a strawberry yogurt bowl that looks picture-perfect and tastes fresh. Practice the simple plating and lighting tips, and you'll have feed-ready shots in under 10 minutes. Pin this guide for your next quick breakfast or brunch photoshoot! Which styling tip will you try first? Ready to make this happen? Let's do it!
Recent Posts
14 Light Spring Strawberry Dessert Recipes That Feel Seasonal
Spring mornings beg for bright, light desserts that match the season. You want strawberry sweets that feel fresh, not heavy, and that celebrate the fruit's short, sweet moment. These 14 Light...
12 Simple Easy Spring Strawberry Recipes That Anyone Can Make
Spring is the season when strawberries smell like sunshine, and your kitchen wants to celebrate. If you’ve got a basket of fresh berries and a craving for simple, fresh flavors, these 12 simple...